UPDATE FEB. 2025: Updated tutorial to point to latest release of VPX (10.8.0 Final)
---
Introduction and prerequisites
This is a tutorial on how to manually update vpx, vpinmame and B2Server. This assumes you already have a fully functional setup. If you are just starting out from scratch, I highly recommend to start with an all-in-one installer, like Baller (https://www.nailbuster.com/wikipinup/doku.php?id=baller_installer). This tutorial is for Windows installations.
But wait, why is a tutorial on manually updating even necessary, you ask? Good question, Baller comes with an update utility. And by all means, please use that instead of following this tutorial. The update utility packed with Baller is a much more user-friendly and hassle-free experience than trying to manually update everything. However, due to the rapid development of the various software packages, auto-update utilities cannot be expected to always keep the same pace. And once in a while, you might see a table being released that requires a more recent version of vpx/vpinmame/b2s. So, if you just have to have that latest table and can’t wait for the auto-update utility, manually updating your setup is needed.
While it isn’t too difficult, it might be tricky for newcomers to find out how to do this properly, and with every new table release, it has become quite common that the support threads show at least a few users complaining that the table doesn’t work properly for them. In almost all of these cases, it is actually related to the user not being on the correct version of vpx, vpinmame or b2server, or they think they are, but they didn’t upgrade properly. So I thought it would be good to try to collect all necessary information, as well as common pitfalls and issues in a single thread as an easy reference. I will be happy to update (or correct) where needed and add other common issues and pitfalls and tips if you know more of them.
Disclaimer: by no means do I pretend to be an expert on any of this, I merely try to share my own experience and what I learned from reading these forums. There are also quite a lot of excellent video tutorials out there that do an even better job than I can to explain all of this. So if you prefer video tutorials, here a few really good ones (that also served as a basis of inspiration for this post).
Link to some video tutorials
Don't like reading text, no worries check out the below tutorials.
https://www.youtube.com/watch?v=uE3uayzA5_s&ab_channel=RudysArcade (this video in particular was a very big help and the below instructions are almost exactly coming from this video)
https://www.youtube.com/watch?v=v3jBGboRwz0&ab_channel=MajorFrenchy
How to check which versions you have
Before going out of your way to update, it might be best to check which versions you actually have installed.
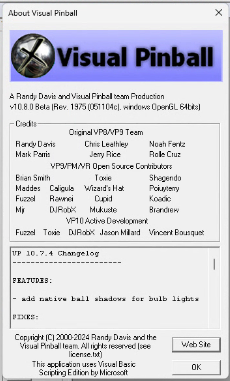
- VPX: Go to you VisualPinball folder and launch VpinballX_GL64 (or whichever version you want to check). Click on ‘Help” → “About”. It will show the release number. Notice that the release number shown here will not mention the more common release name often used in the forums (i.e. v10.8.0 Beta (Rev 2046) = VPX RC7). This can be confusing, but you can easily find out what version you have on this page: https://github.com/vpinball/vpinball/releases
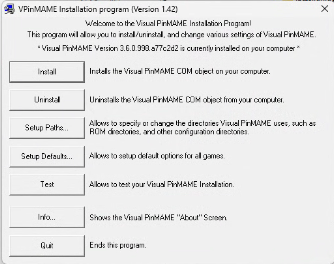
- VpinMAME: Go to your VisualPinball/VpinMAME folder and launch Setup64.exe (or Setup.exe for the 32 bit version). Click on yes when Windows asks if it is OK that this app will modify your device. The version number will be shown in the window that pops up.
- B2S server: Go to your VisualPinball/Tables folder and run B2S_ScreenResidentifier.exe. The version will be shown in the bottom right corner of the main window that pops up.
Manually updating Visual Pinball X
Step 0: It is always a good idea to make a backup. Just make a copy of your whole Visual Pinball directory. If something doesn’t work as intended, at least you can always go back to how you had it before.
Step 1: Download the install zip file
Usually the table will list which version of VPX is needed, often even directly providing a link to the github page.
You can find the vpx releases here: https://github.com/vpinball/vpinball/releases
At the moment of writing, Visual Pinball X 10.8.0 Final is the latest release you should install. (https://github.com/vpinball/vpinball/releases/tag/v10.8.0-2051-28dd6c3)
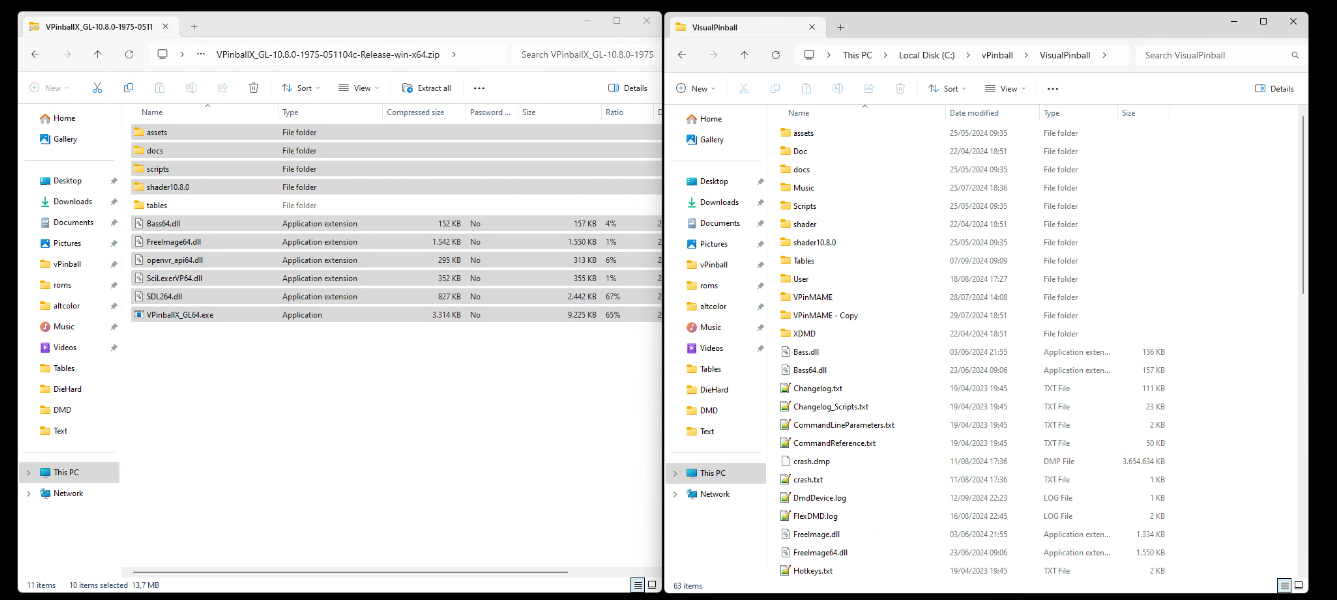
If you click on this link, you will see quite a few zip files to download. Any zip file that has Debug in it’s name, you should ignore. You only need to download the zipfiles that have Release in the name. Also ignore the source code.
VPinballX-10.8.0-2046-043fac7-Release-win-x64.zip → 64bit of DirectX version of VPX
VPinballX-10.8.0-2046-043fac7-Release-win-x86.zip → 32bit of Direct X version of VPX
VpinballX_GL-10.8.0-2046-043fac7-Release-win-x64.zip → 64bit of OpenGL version of VPX
VpinballX_GL-10.8.0-2046-043fac7-Release-win-x86.zip → 32bit of OpenGL version of VPX
You can install all 4 versions together without any issue. For an average user, you will most likely only need the 64bit OpenGl version, however some tables only run on 32bit and some older tables (and VR users) might require the directX version. Anyway, just download the zip files you need.
With the final release of 10.8.0, it became a bit easier to upgrade existing installations, as you only need to download a single zip file:
Main.Download.Minimal.-.VPinballX80_Minimal.zip. This file contains all versions (32bit, 64bit, DirectX and GL).
Step 2: Right click on the zipfile, click on properties and then on “Unblock”. This tells Windows this manually downloaded file is safe to use.
Step 3: Copy the zip file contents into your VisualPinball folder.
You can now open the zipfile and copy ALL it’s contents into you Visual Pinball Install Folder. You don’t really need the tables folder (or the docs folder – but why not keep that up to date also), but make sure you copy the assets, scripts and shader folders as well as all the DLLs. You can confirm it is safe to replace existing files.
Note: If you are a VR user, you may want to avoid overwriting the file openvr_api64.dll from the 64bit OpenGL VPX zipfile if you prefer using a different version for your VR setup.
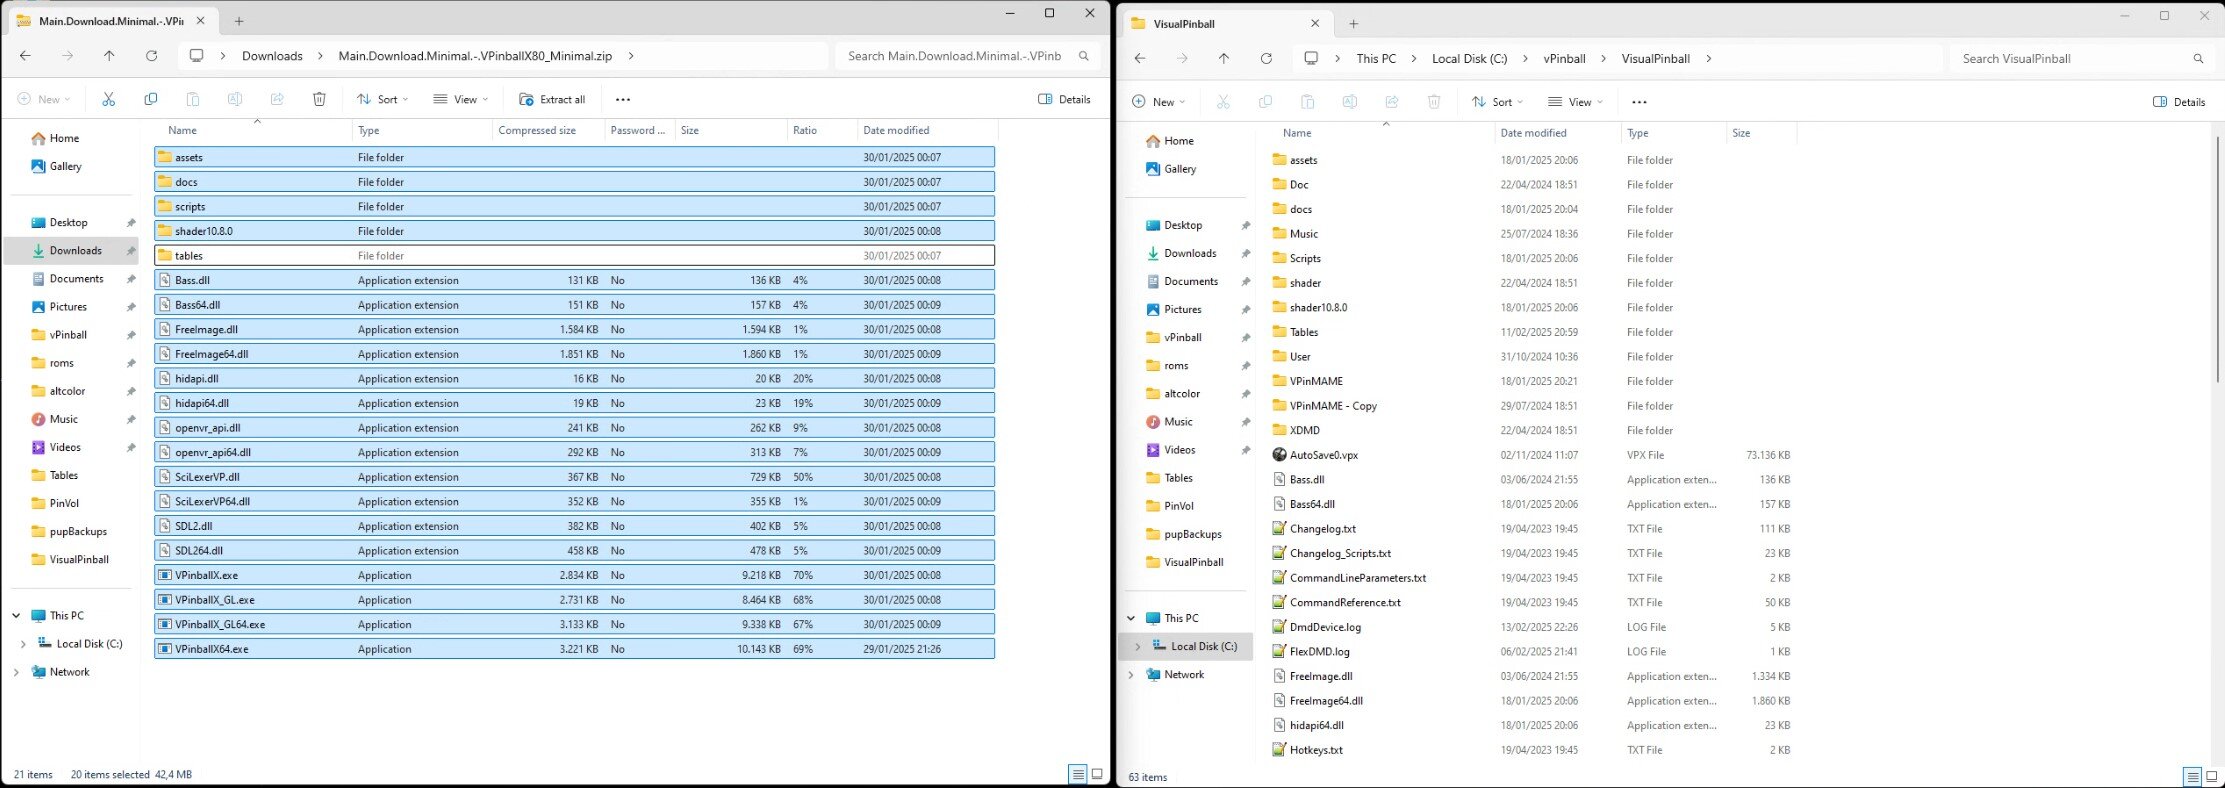
Optional step 3.b: Rename VPinballX.exe
If you installed all the different versions (32/64bit and DirectX/OpenGL), you should now have 4 exe files (VPinballX.exe, VPinballX64.exe, VPinballX_GL.exe, VPinballX_GL64.exe). If you used baller installer, it will by default launch tables from popper using the VPinballX.exe, which is the 32bit directX version - which is generally not what you want. You could rename VPinballX.exe to VpinballX_32.exe and rename VPinballX_GL64.exe to VPinballX.exe. This will ensure popper launches tables by default using the 64bit OpenGL version of VPX.
Step 4: Manually launch VisualPinball once
It is good idea now to just double-click on every newly installed exe. Windows Defender might complain it “protected your PC by preventing an unrecognized app from starting”. If you get this error message, click on "more info" and then “Run anyway”. If Visual Pinball starts normally, you can quickly check your audio and video settings. Normally, it will keep your settings, but never hurts to have a quick check.
Manually updating VpinMAME
It is very important that you also update VpinMAME. VpinMAME follows it’s own development and it is responsible for emulating the roms. A lot of recent tables really need the latest version of VpinMAME, only updating VPX is not sufficient.
Step 0: If not already done, make sure you have a backup of you VpinMAME folder.
Step 1: Download the install zip file
All releases can be found here: https://github.com/vpinball/pinmame/releases
At the moment of writing, the latest release is: https://github.com/vpinball/pinmame/releases/tag/v3.6.0-1227-ecd032e
Here you will find a bunch of files, fortunately you can ignore almost all of them. You only need 2 zip files:
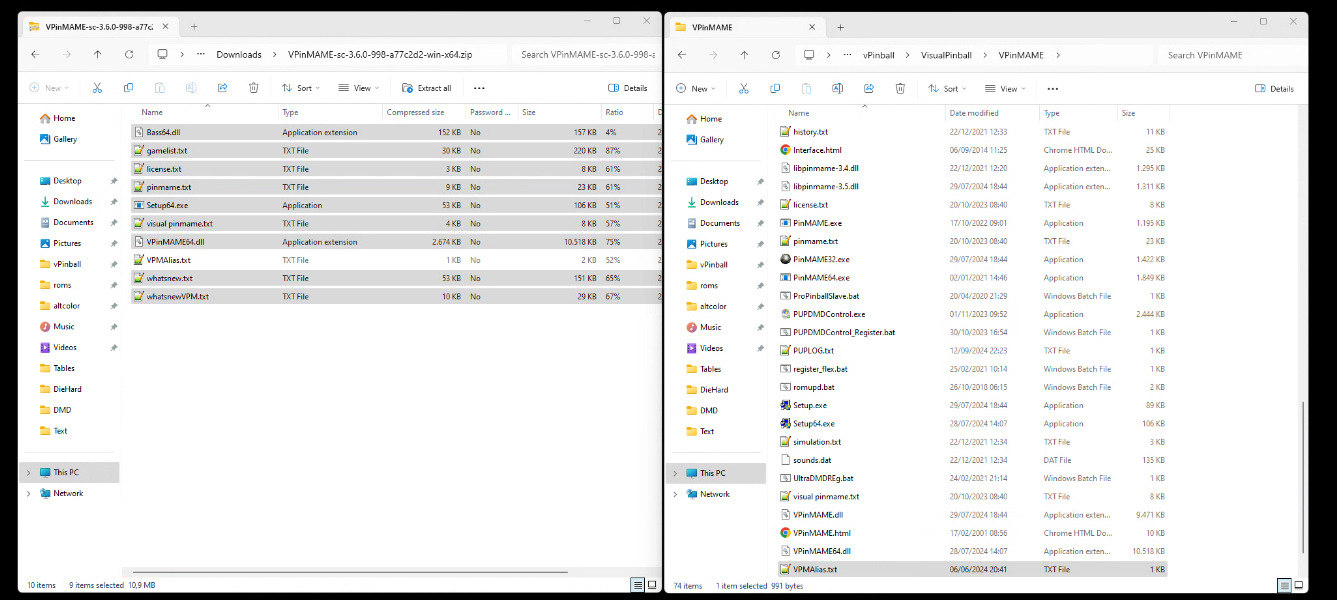
VPinMAME-sc-3.6.0-1227-ecd032e-win-x64.zip
VpinMAME-sc-3.6.0-1227-ecd032e-win-x86.zip
The “sc” stands for the version that supports Stern colored ROMS. In any case, generally there is no reason not to install this version. Again, there are 32 bit and 64 bit version which can coexist without any issue. If you are running tables that need 32 bit, make sure to download both zip files.
Step 2: Right click on the zipfile, click on properties and then on “Unblock”. This tells Windows this manually downloaded file is safe to use.
Step 3: Copy the zip file contents into your VisualPinball\VPinMAME folder.
WARNING: If you modified your VPMAlias.txt, do not copy that file. If you made any modifications, you have to manually merge the 2 files. However, if you never modified VMPAlias.txt, you can ignore this warning (and in any case, remember step 0).
Copy all files into you VpinMAME folder. Again rinse and repeat for the 32bit zipfile.
Step 4: Install VpinMAME
Click on Setup.exe (if you installed the 32 bit version). You might again get a warning first from Windows Defender. Click on “More info” and then on “Run anyway”. You will then get a second warning from Windows asking if you want to allow this app to make changes to your device. Click on YES.
Now you can click on install in the VpinMAME Installation program. This goes extremely fast. If you got a confirmation that installation was successful you can quit the install program.
Rinse and repeat with the Setup64.exe to install the 64bit version of VPINMAME.
Manually updating B2Server
Step 0: If not already done, make sure you have a backup of you Tables folder. This is where B2Server resides, inside your Tables folder.
Step 1: Download the install zip file
All releases can be found here: https://github.com/vpinball/b2s-backglass/releases
At the moment of writing, the latest release is: https://github.com/vpinball/b2s-backglass/releases/tag/v2.1.3
Fortunately, this will be a bit easier. You should see only 1 zip file.
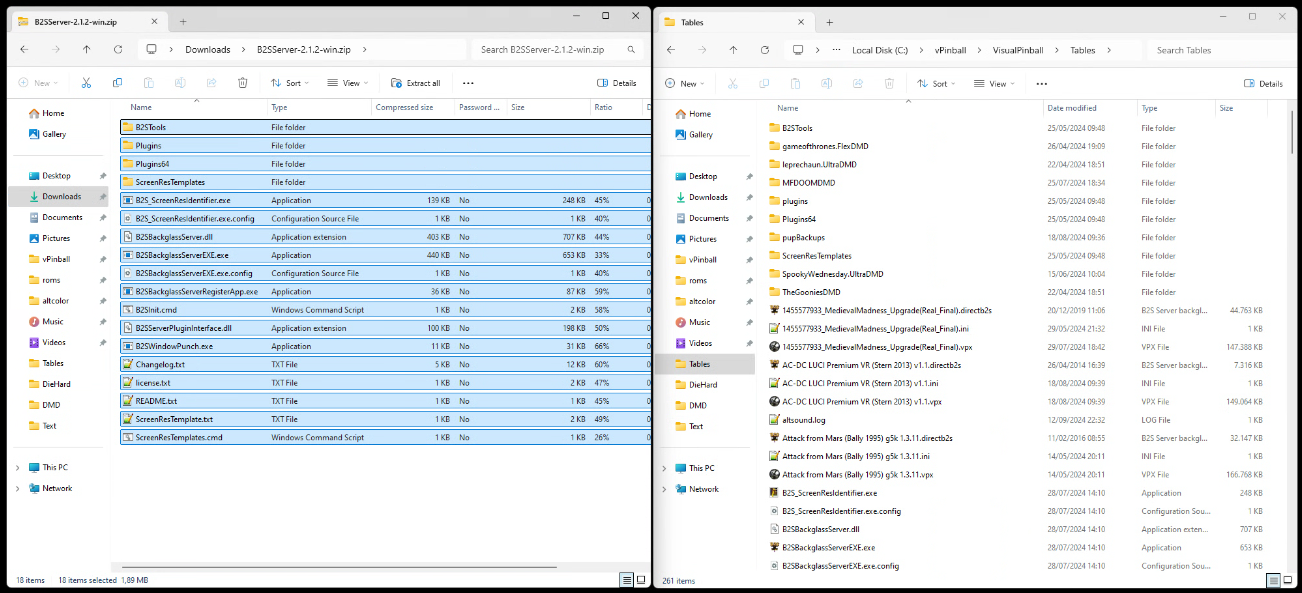
B2SServer-2.1.3-edfba08-win.zip
Step 2: Right click on the zipfile, click on properties and then on “Unblock”. This tells Windows this manually downloaded file is safe to use.
Step 3: Copy the zip file contents into your VisualPinball\Tables folder.
Make sure to copy all files and folders (including B2STools, Plugins and Plugins64).
Step 4: Run B2SBackglassServerRegisterApp.exe
You will again get a warning from Windows asking if you want to allow this app to make changes to your device. Click on YES.
You might get a warning that B2S Server is already registered and if you want to re-register it? Click on yes. It should show a popup saying that everything is fine. Click on OK.
Then you will be asked if you want to reregister the context menu. Again click on YES.
And that is it. With these steps, you should have the latest releases of VPX, VpinMAME and B2S Server.
Common pitfalls, issues and tips
If you have a table misbehaving, below are a few common mistakes, pitfalls and tips. Reach out if you know more tips that I can add.
- Not copying the scripts / shader folder: When updating VPX, make sure to also copy the complete scripts folder.
- Not updating VpinMAME: make sure to properly check the table description. It is often not sufficient to only update VPX, you also need to update Vpinmame separately.
- Launching an incorrect version of vpx through your front-end (Like Popper). Make sure if you use a front-end, it launches the correct version of vpx (i.e. 64bit, not 32bit).
- Not using the “normal” folder structure. If you have your tables folder and B2S server in different folders, you might have scripts at a different location than the one VPX expects. Try to stick as much as you can to the normal Visualpinball folder structure to avoid any issues, unless you know what you are doing).