I thought I would do my best to explain LUTs, and how they are applied in Visual Pinball X. (With help from Flupper.) I will update this as I learn more or as people contribute ideas.
INTRODUCTION
For each VPX table you can apply a Color Grade LUT (Look Up Table or LUT), which is a file that VPX uses to adjust color based on a PNG image of color values. It’s basically a color translator. (This is much like an Instagram filter that makes a photo look like a sepia-tone or an old Polaroid.)
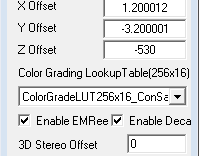
The LUT looks like a bar of 16 squares with color gradients in each box. It is selected and applied in VPX on the Backglass Options panel, near the bottom. The default on many tables is usually either the ColorGradeLUT256x16_1to1 or ColorGradeLUT256x16_ConSat LUT included in the template VPX table.
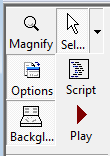
Where to apply or select a LUT:
WHAT A LUT DOES
The LUT works by reassigning color values on your screen based on the color spectrums on the LUT file.

Here’s one square of the 1-to-1 LUT, and the same square of custom LUT, that’s been changed to add contrast. When VPX reads the green on the left, the LUT tells it to display the darker green on the right.

One important thing to remember is changing a color based on a LUT is purely visual perception. Darker LUT colors doesn’t mean changing colors on the playfield and the same light level. A LUT changes how everything on the screen appears including colors and light. What's unique is that LUTs can be very carefully created to make slight changes to some values and bigger changes to other values. Darker colors in a LUT will make the table look more shadowy because it’s applied to all objects, and the light level appears darker. Some LUTs can enhance contrast, make colors more saturated and vibrant, or change colors altogether.
The VPX 1-to-1 LUT:
The VPX ConSat LUT:

The “1-to-1” LUT above does no color transformation, it is color “neutral” so to speak. The VPX “ConSat” adds Contrast and Saturation for slightly deeper, richer colors. It's a very subtle shift. But these aren’t the only two, as we’ll see later, they are just the default VPX ones.
You can Export existing LUTs from TABLE A and import them into TABLE B via the Table>Image Manager. Then, select the LUT image you imported on Table B on TABLE B’s Backdrop options panel. (See above)
Or you can create your own based on your monitor calibration or preference if you have photo editing software. (See below.)
Here’s the 1-to-1 LUT again on top, and a custom LUT by Mandolin's below. You can see that the colors are richer across the spectrum. There's a visual representation of this further down.
1-to-1
Mandolin

If you look at Flupper’s Tales of the Arabian Nights, you see the effects of LUTs very clearly. You select one of several LUTs based on your preference by hitting the MagnaSave buttons.
During game development, Flupper had requested that people open a screenshot of the playfield in Photoshop (or other software), and then adjust the color their liking, then adjust a LUT file with the exact same changes as the screenshot. The result was a series of LUTs from mlager8, Voglidiacane, bassgeige, and Mandolin.
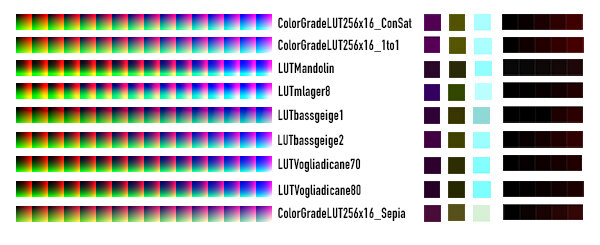
To illustrate the differences, I placed them together, along with images of individual colors in the spectrums to show the variation of the same color square in each of the LUTs. The dark 5 squares on far right of the comparison are the left most top row, first five squares, to highlight the differences in the color changes from near black to dark red. Some barely show any change at all, when compared to the VPX 1to1.
Here’s the thread where the TOTAN LUT discussion went down. It’s a good read.
Vogliadicane did a great comparison of his series of LUTs.
IMPORTANT NOTE: I’m going to stop here for second and mention three things: 1.) I found the color contrast/saturation difference between 4K and 2K screens to be BIG. Tables that look perfect in 4K, looked a little washed out in 2K. When I applied a custom LUT in 2K, and switched over to 4K, the table was too dark for me. (I run 2K/120hz on a 4K screen because I only have 30hz at 4K. So I have the benefit of viewing tables in 4K.) 2.) Your GPU and screen setup affects all of this, so they will affect how one particular LUT looks on your setup.
3.) Some tables have LUT options built in, like TOTAN. And I'm seeing more and more of this. And some tables may not need a change, if you like what you see.
OK.
I exported several of the LUTs included in TOTAN and started trying them on other tables. I found that Mandolin’s LUT could be applied to lots of 2K tables and I preferred the way the colors looked. More contrast. Richer colors. Tables looked more dimensional. But it does not look good on some tables. So I usually import my own, mlager8’s and Vogliadicane’s and test them all on each table. (Sometimes one of the VPX defaults or the author’s LUT is best, too.)
So, I tried my hand at creating one (see below) with the help of Flupper (His technique is detailed below.)
Onevox LUT

Mandolin LUT
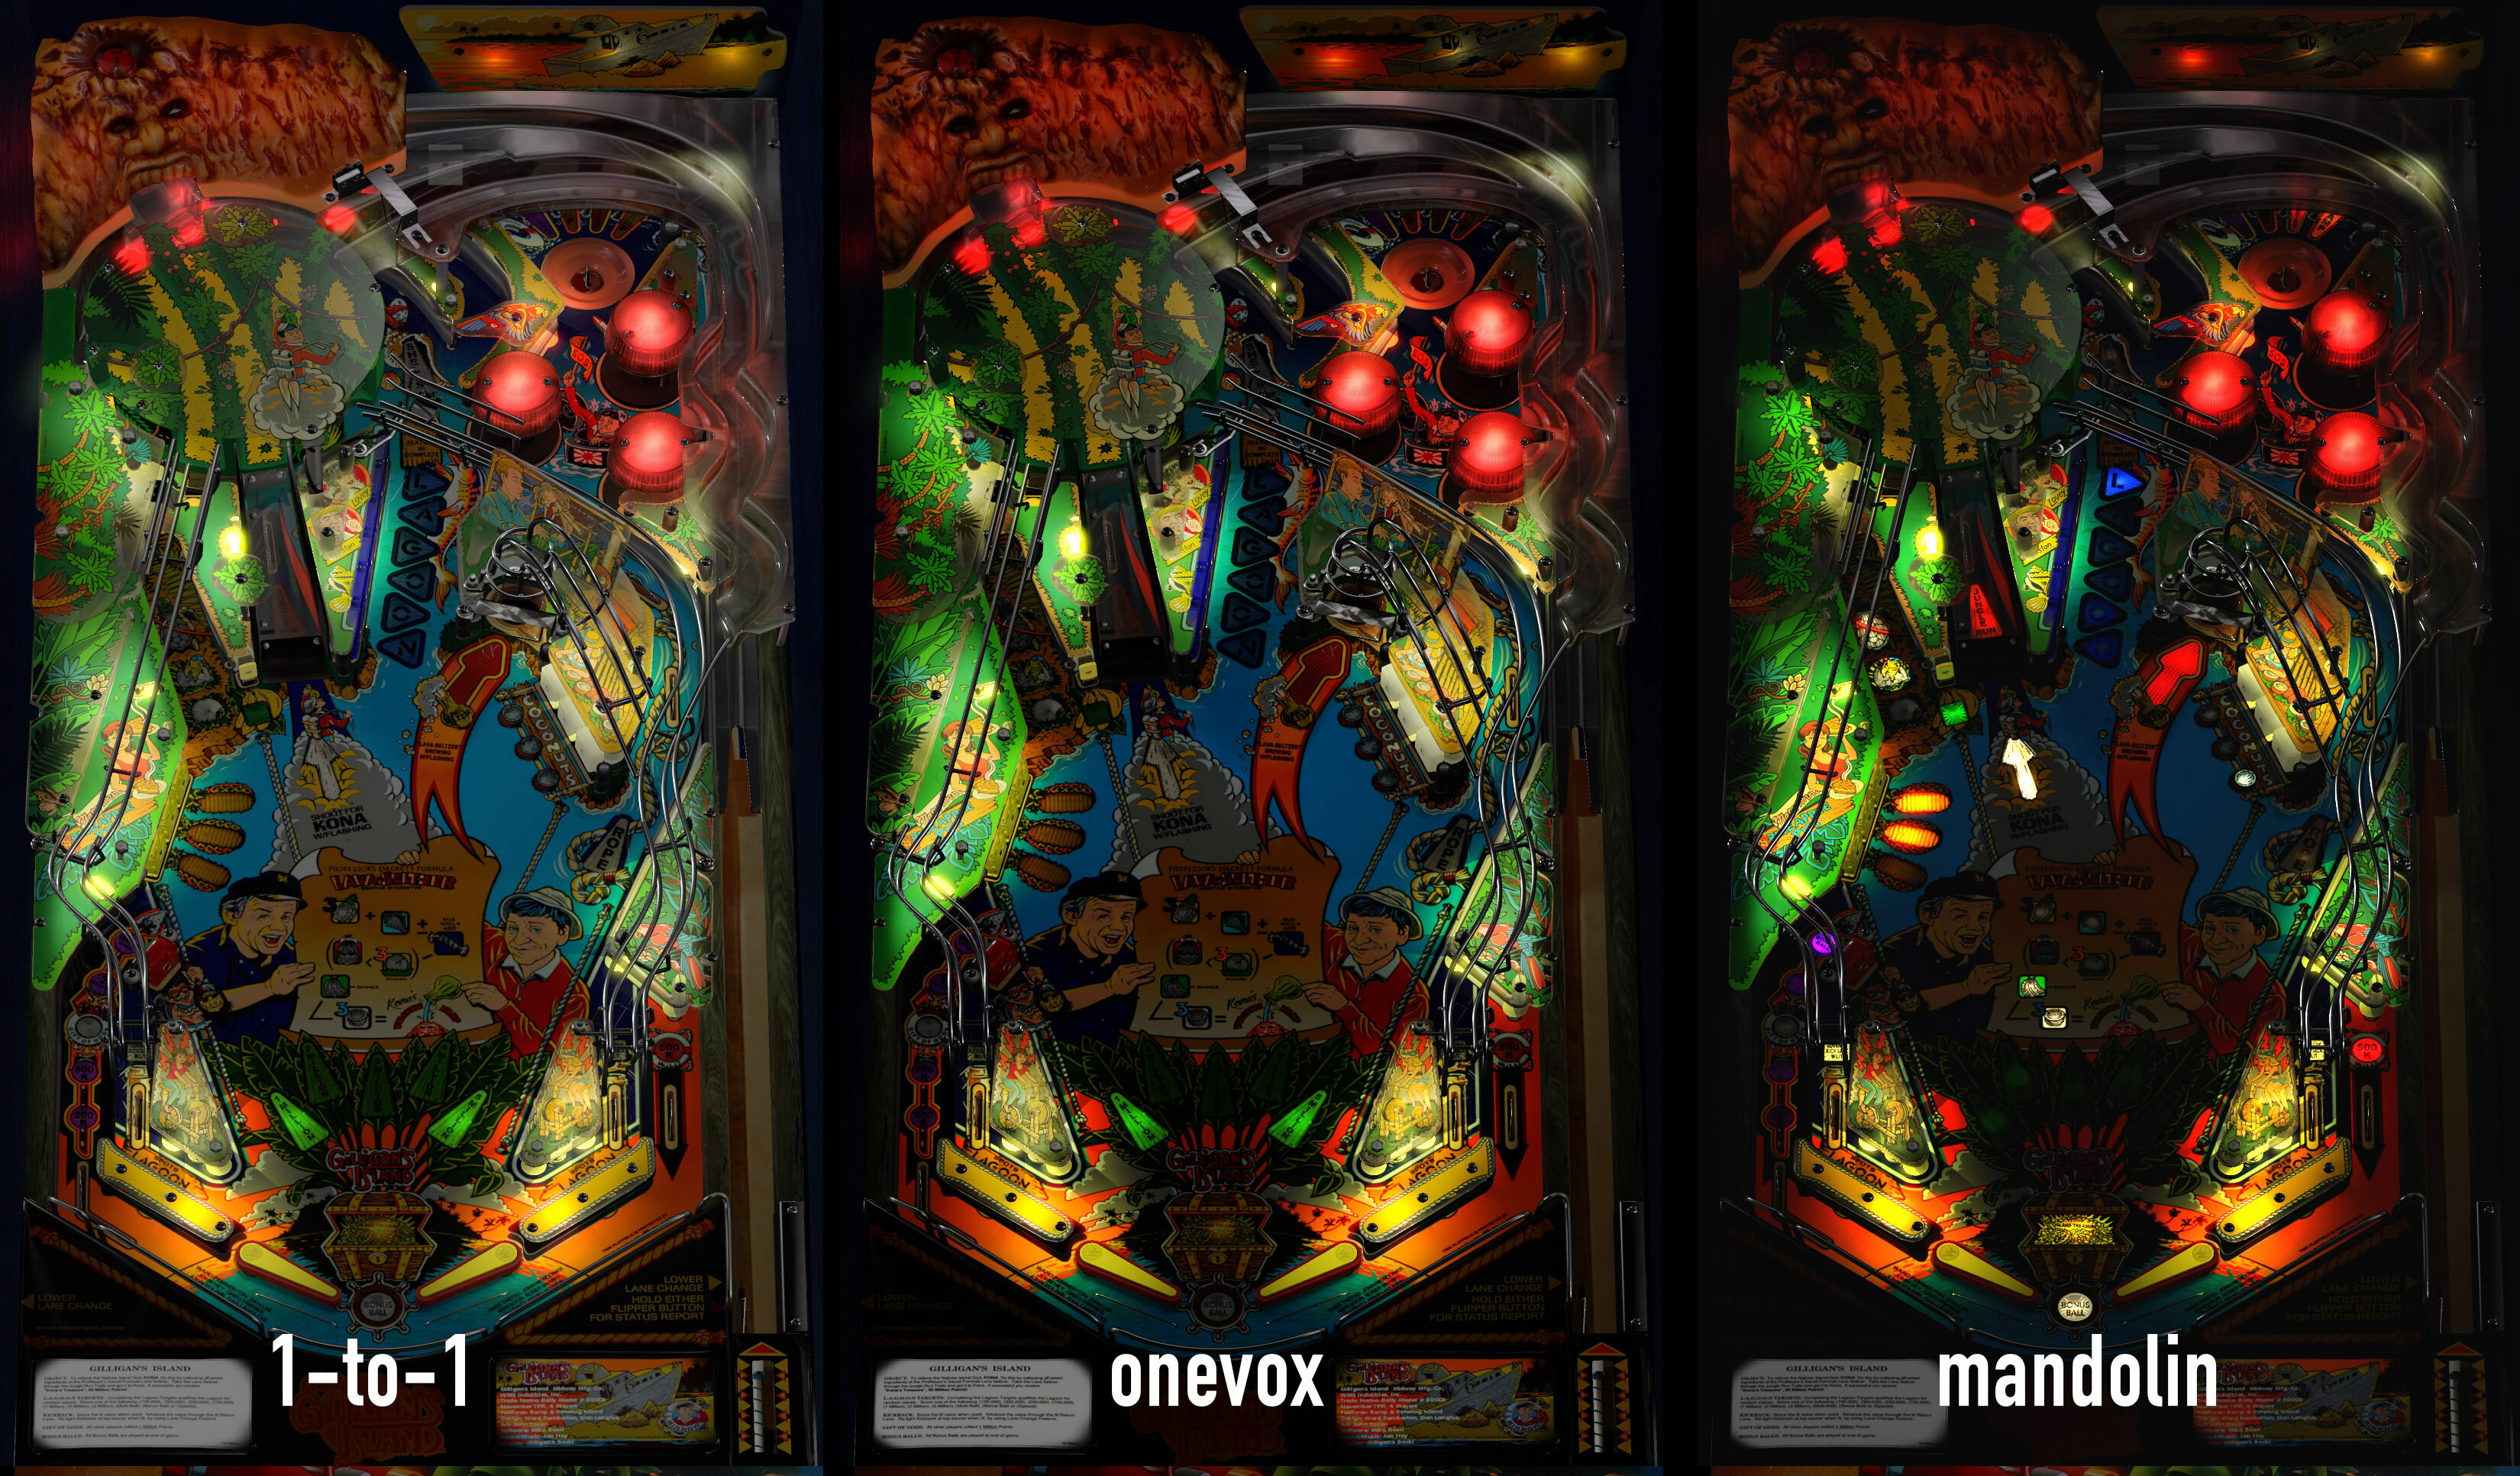
Here’s a visual on some LUTs applied to Dark’s Gilligan’s Island. It was a random table selection. I didn’t use TOTAN because you can play with that easily enough. The 1-to-1, with my custom LUT, and Mandolin’s LUT. Mine was an attempt at middle ground for some tables. Which do you prefer?
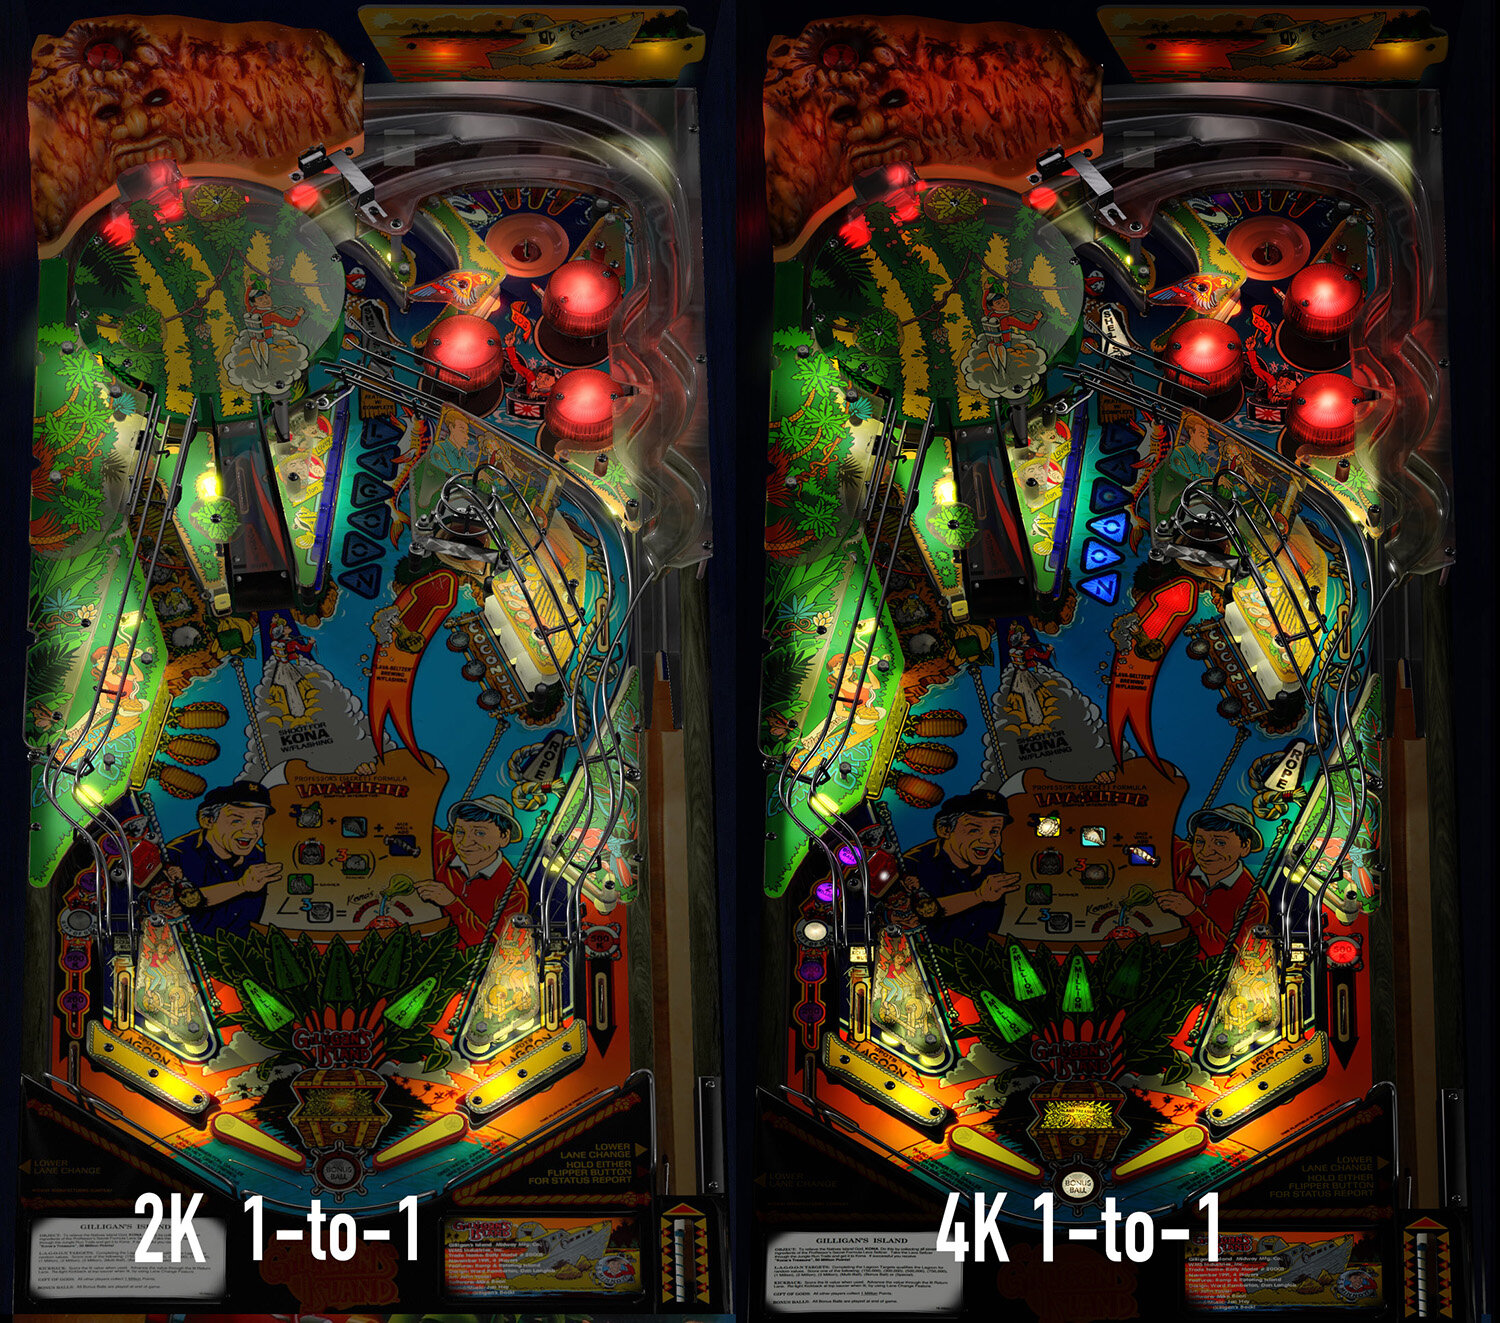
Now here's the 1-TO-1 LUT applied on 1080 and 4K resolution.
The LUT option is a huge feature of VPX in my opinion. The VPX devs don’t get enough credit for including stuff like this. Flupper’s script for LUT selection is super cool and kudos to the LUT creators.
MAKING A CUSTOM LUT
If you’d like to try your hand at creating a custom LUT for your monitor or preference, you’ll need Photoshop or other photo editing software. There are two fairly easy ways to do it in Photoshop. NOTE: I’m not a Photoshop guru, so there may be even better ways to do this. Please comment and let me know your method.
IMPORTANT: In the first method, we will be adjusting the color on a screenshot of table, then applying the same changes to the 1to1 LUT file. So take notes on changes and values as you work on the table screenshot because you will apply the same changes to the LUT file. The second method is easier to do, but a little harder to explain.
This method works for FS or DT.
Pre-work:
Open VPX and go to NEW, and open the Example Table. Go to Table, then Image Manager, and then export the “ColorGradeLUT256x16_1to1.png” LUT file.
METHOD 1:
1. Load a table that you want to improve color on for your setup. Check to see what LUT is applied by looking at the Backdrop Options panel. If it is NOT the 1to1 LUT, import the 1to1 LUT from your Pre-work into the table, and apply it to the table. Go to the top menu: Table, Image Manager, Import, select 1to1 LUT you saved from Pre-work, Save. Then select the 1to1 LUT on the Backdrop Options panel.
2. Load The table, and start a game so you have GI lit, then take a screenshot. (PrntScreen, then copy to Paint or Photoshop, and save).
3. Open the screenshot you took and the 1to1 LUT as separate files in Photoshop. Don’t change the LUT from ”background” by unlocking it. (On my Mac, Photoshop wants a background to create a PNG for some reason.)
4. With the screenshot open, adjust the image until you like what you have. You can do this in one of several ways in Photoshop. Go to Top Menu: Image > Adjustments > (and select one of several options for adjusting colors).
5. One possible option is Hue/Saturation. Slide saturation to the right and brightness to the left and see what happens. The colors got darker and richer. NOTE: Small changes to LUTs can have big visual impacts in VPX! You could use Brightness/Contrast also. I like Curves, but they’re tricky. Keep track of each change the order you did them. It's important.
6. Once you have the screenshot the way you like, apply the same changes in the same order to the 1to1 LUT file. To save, simply save as a PNG.
7. Import your LUT file into VPX and see result. You will likely have to do multiple versions/tests to get what you want when you import your LUT into VPX.
METHOD 2:
1. Load a table that you want to improve color on for your setup. Check to see what LUT is applied by looking at the Backdrop Options panel. If it is NOT the 1to1 LUT, import the 1to1 LUT from your Pre-work into the table, and apply it to the table. Go to the top menu: Table, Image Manager, Import, select 1to1 LUT you saved from Pre-work, Save. Then select the 1to1 LUT on the Backdrop options panel.
2. Load the table, and start a game so you have GI lit, then take a screenshot. (PrntScreen, then copy to Paint or Photoshop, and save).
3. Open the screenshot you took AND the 1to1 LUT as SEPARATE files in Photoshop. Don’t change the LUT from ”background” by unlocking it. (On my Mac, Photoshop wants a background to create a PNG for some reason.)
4. Create an adjustment layer on the screenshot file, which will not change the screenshot image but apply changes to a overlay on top. Top Menu>Layers>New Adjustment Layer>Color Lookup. Name you adjustment layer and click OK.
5. It will default to Properties and allow you to choose a preloaded Adobe LUT profile. Those are for photos and video, so click the adjustments tab. Now you have the same adjustment options as Method 1. You will ONLY make adjustments to the Adjustments Layer, which will apply the color changes to the screenshot image layer.
6. One possible option is Hue/Saturation. Slide saturation to the right and brightness to the left and see what happens. The colors got darker and richer. NOTE: Small changes to LUTs can have big visual impacts in VPX!
7. Once you have the screenshot the way you like, drag the Adjustment Layer from the Layers Panel on the screen shot file onto the LUT image tab, which will open the LUT image, and drop. The adjustment layer will apply to the LUT image. Save the LUT file as a PNG.
8. Import your LUT file into VPX and see result. You will likely have to do multiple versions/tests to get what you want when you import your LUT into VPX.
NOTE: Do not change the pixel dimensions or resolution of the LUT you export and adjust, or VPX won’t be able to read it.
I welcome feedback, improvements, questions, and areas that need clarity.
Onevox