Content Provider topper2k Posted May 9, 2021 Content Provider Posted May 9, 2021 I've been running some MAME games on my pincab for a while. I find I quite like it. It's nice to have the playfield for vertical games and the backglass for horizontal games. Plus the backglass makes it easier for people to watch a game than on a typical arcade cab. (BTW, I do have a dedicated MAME cab. But it's a cocktail style that I built primarily for vertical 2-player games.) I've really been wanting to play some lightgun games. The cocktail arcade cab obviously wasn't going to work very well. But the pinball cabinet... Yeah, that could work! A little more on the build in a sec. First, here's a demo.
Content Provider topper2k Posted May 9, 2021 Author Content Provider Posted May 9, 2021 Initially, I spent a little time trying to figure out how to add lightgun games to my pinball front-end of choice (PinballY). I was already running MAME there anyway. I totally think you could use PBY for pinball + MAME + Lightgun games. But I ended up deciding to move my MAME (and Sega System 3) games out of PinballY and into Launchbox. I found I just like the separation. Part of it is that in my cabinet, you need different controllers for each of these. So to play a MAME game, you have to get out the gamepad. Same with the lightgun. So the cab basically has 2 modes, Pinball (PBY) and Arcade (Launchbox). It boots directly to PBY and you can switch modes via desktop shortcuts. My keyboard/trackpad, wireless gamepads, and lightgun all fit in a drawer hidden underneath the cab. The IR lights you see in the video are from de-cased Wii USB sensor bars. You can't really see these in real life. The camera picks up the IR light, but our eyes don't.
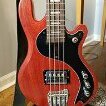
Content Provider topper2k Posted May 9, 2021 Author Content Provider Posted May 9, 2021 The lightgun is a Namco Guncon 2 that's been gutted, painted, and reassembled with its innards replaced with a Samco lightgun kit. I looked at some other solutions. The main options are the Aimtrak by Ultimarc and the Sinden lightgun. I chose Samco partly because I like DIY projects (obviously). The Sinden looks cool, but it's a crowd-funded project (which makes me worry about future support) and it puts a white frame around your game (rather than using IR lights) and it wasn't clear when they'd actually be shipping another batch of them out. Aimtrak looked really cool too, but they were (and still are) also on backorder and I thought the Samco would end up being cheaper (it was not, but more on that below). And the Samco Guncon 2 is a little smaller than Aimtrak and Sinden as well, which makes it easier to store. The Namco Guncon 2 came off eBay ($19) and looked like this. You pretty much gut it to install the Samco kit ($13), and Arduino ItsyBitsy ($17) and a new IR camera from DFRobot ($29). So I figured I'd paint it while I had it apart. I scuff sanded all the parts and covered up the orange with a white primer. Then a coat of silver metallic. Then some masking tape and a coat of black. Assembling the gun with the Samco kit and IR camera. Here's a closeup of the camera. If you're building one, note that I've got it the wrong way here. The camera needs to rotate about a quarter turn counter-clockwise from where you see it below. Final assembly (though I didn't have the USB cable installed when I took this). You'll notice some crackling in the paint. This happened when I applied some clear coat. I've used this brand and these colors of paint together before, so I'm not sure what went wrong. My options were to strip it and start over, or see it as a Bob Ross "happy little accident." I went with the latter and decided the crackling adds a degree of weathering. I added a few more coats of clear to lock everything in place and moved on. So far, so good. I didn't take any pictures of installing the IR lights in the backbox. I used one of these USB IR Wii sensor bars ($11). I just de-cased it, routed some channels in the back of the bezel, and drilled some holes for the bulbs to poke through. With Samco, you have the option of what they call the 2IR or 4IR Arduino code. Really if you're using the Wii sensor bars, it's 1-bar (6IR) or 2-bar (12IR). But anyway... Initially I went with the 1IR option. I wasn't thrilled with the accuracy and you had to stand really far back from the screen (like one big step back from where you'd normally stand for pinball) otherwise it wouldn't track across the whole screen. So I got another sensor bar ($11), upgraded to the 4IR version of the code and it's brilliant. Much more accurate, you can stand closer to the screen, the 4IR version is massively better in every way. If you're keeping track, at this point I've spent $100. An Aimtrak (when they're in stock again) would have been about $120 shipped. So I saved $20 and have my gun now instead of having to wait who knows how long. Plus, the Aimtrak uses an IR bar just like the Samco. But it only comes with 1 bar and as far as I know, doesn't come with a 2-bar option. Maybe Aimtrak's tracking is better than Samco. I don't have any way of knowing. But if I'd spent $120 on the Aimtrak and gotten the results I did with the single sensor bar Samco, I'd have packed it up and mailed it right back. But wait... there's more. I did run into one fairly significant hiccup with Samco. I couldn't get the 4IR Arduino sketch to upload to the Adafruit ItsyBitsy 32u4 - 5V 16MHz board that I initially purchased. It's listed as a supported board by Samco. And the 2IR sketch uploaded fine. Loads of other sketches uploaded fine. And the 4IR sketch compiled. But it would not upload. I sought help in all the Arduino forums and from the guy behind Samco (he was super helpful BTW). But nothing worked. As a last ditch effort, I decided to try a different flavor of the ItsyBitsy board, an M0 (another $17). The 4IR sketch uploaded to it fine (woot!) but no matter how hard I tried, I could not desolder the 1st ItsyBitsy from the Samco kit. So I decided it'd be easier to just buy another Samco kit ($13). So... I ended up spending $130. That's $10 more than an Aimtrak and $10 less than a Sinden (if you can get either an Aimtrak or Sinden).
Content Provider topper2k Posted May 9, 2021 Author Content Provider Posted May 9, 2021 One final bit of info. The lightgun really did not like the multi-monitor setup that's needed for virtual pinball. I struggled to find a solution for this by modifying the Arduino sketch, but couldn't get it to work. I ended up with a software solution. I chose Display Fusion (DF), a multi-monitor manager. There are others out there you could use. But basically what I needed to do was create two monitor profiles (default and lightgun) in DF. Then in DF you create a keyboard shortcode to switch between the monitor profiles. Ctrl+L for lightgun and Ctrl+D for default, for example. Then I created a pair of very simple AutoHotKey scripts that pressed these key combinations. In my arcade front-end, Launchbox, I just set the AHK scripts to run before and after each lightgun game. One more really final bit of info, initially I had trouble with my pin-cab's SSF in MAME games. It was weird to have game sounds coming through the table. It wasn't really noticeable with things like Ms. PacMan. But with the shooters, it just felt super weird. There are probably several ways to solve this. But I was already running PinVol. So I just turned the exciter channels all the way down in PinVol for the "system" profile. Bingo, no sounds coming out of the table during arcade games.
Content Provider Wylte Posted May 9, 2021 Content Provider Posted May 9, 2021 Awesome! And great write-up and video, too. Took me back to grinding out a perfect 100% run of Time Crisis as a kid. Thank you for that 👍 I just want to put one idea in your head - small solenoid in the lower receiver area, for force feedback on firing. No idea if you've got the voltage or pins for it lol
Content Provider topper2k Posted May 10, 2021 Author Content Provider Posted May 10, 2021 7 hours ago, Wylte said: Awesome! And great write-up and video, too. Took me back to grinding out a perfect 100% run of Time Crisis as a kid. Thank you for that 👍 I just want to put one idea in your head - small solenoid in the lower receiver area, for force feedback on firing. No idea if you've got the voltage or pins for it lol Thanks! Both the commercial options, Sinden and Aimtrak, have recoil and non-recoil versions. The recoil version is exactly what you describe. The issue is power. The USB cable won't provide enough on its own. So you have to have a second cable. At least as far as I know. I'm not entirely sure how the Sinden and Aimtrak work. But even so, I don't think Samco has coded for force feedback.


Recommended Posts
Archived
This topic is now archived and is closed to further replies.